Category: Asian Style

Shoji Cabinet For The Dalles

Shoji Cabinet For The Dalles

P1060295    
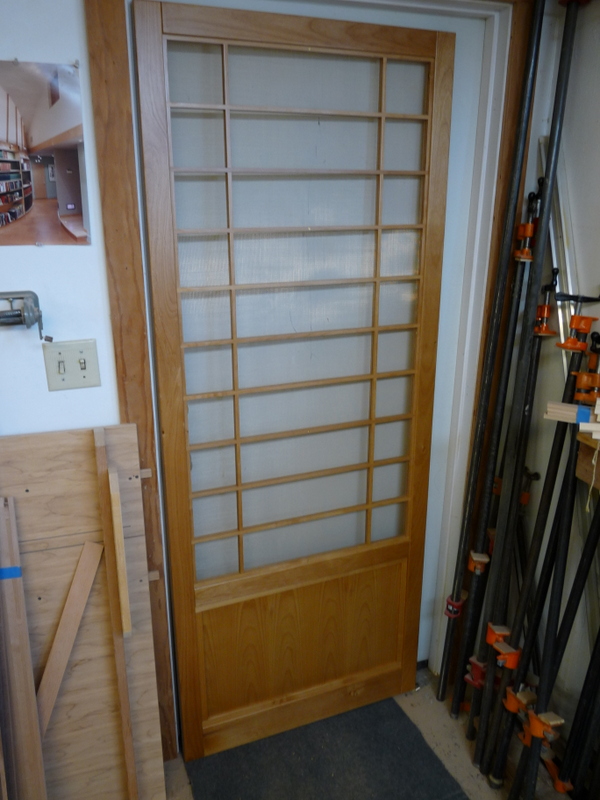
Some of my clients become patrons. In this case, Lauretta and her sister Diana hired me a couple years ago to build shoji for their newly remodeled basement and create a bedroom. I blocked off the end of one room with 2 large shoji made of my favorite wood: Superior Grade Alder.
About a year ago, there was some talk between us about adding a cabinet. They had already discussed this with a cabinet maker in The Dalles OR, where they live. he was to make something that would require 2 or maybe 3 Shoji to cover part of it. It was to have some drawers.
As the months went by, we kept in touch about it and it became obvious that their cabinet maker was too busy to even do it let alone collaborate about it.
I was headed off to Peru at the time, and agreed to get together with them upon my return.
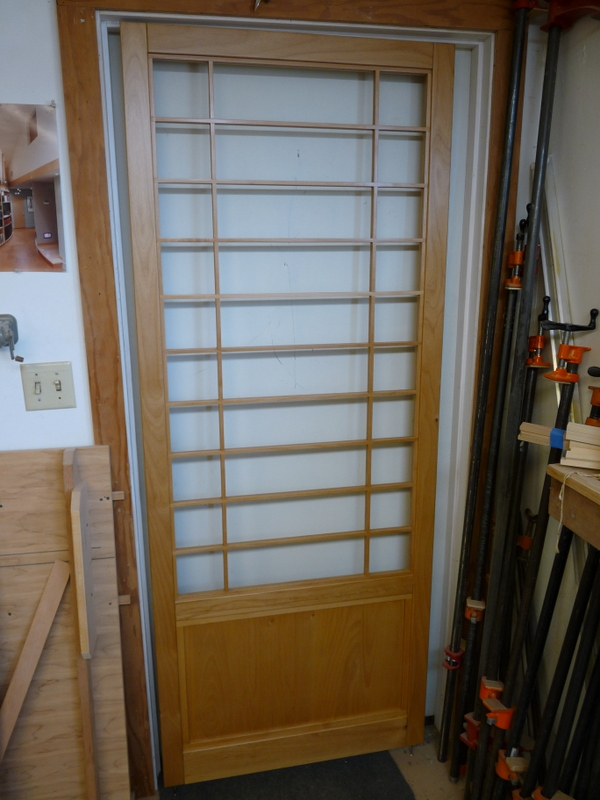
By August, I had a design for a cabinet that I would build and incorporate some sliding Shoji for the face.
They gave me the dimensions and wanted it to look similar to the existing Shoji.
I wanted it be like a Tansu but had to really back off of all the detail a Tansu would have. It would greatly increase the cost and amount of time involved.

01-P1060336

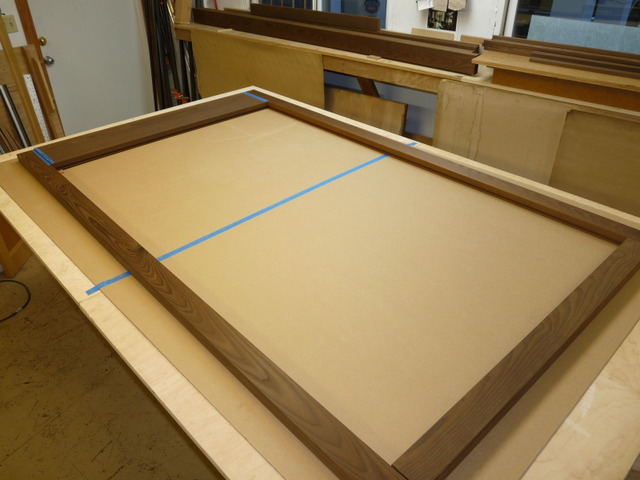
In the end, I had to keep refining the design to make it come apart so it could be moved and I had to lighten it up or we would not be able to carry it in the house.
Originally, I wanted this heavy top and bottom. I replaced that idea with a 3/4″ plywood bottom and added a 1-1/2″ piece all around the bottom plywood to make it look thick.
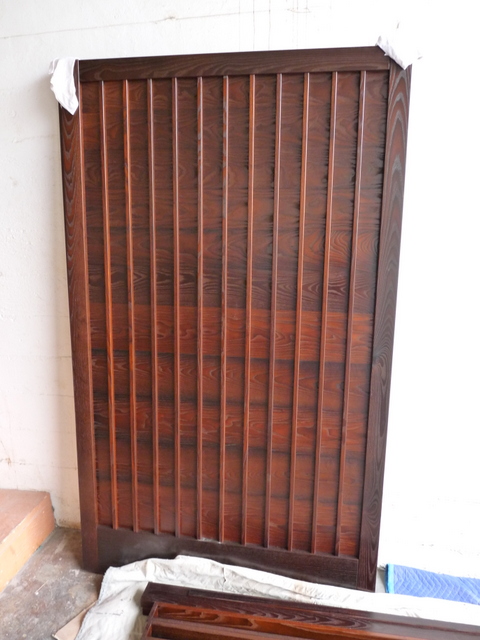
The sides are made similar to the Shoji Koshi-ita panels I had used in their Shoji. The size of the kumiko grid is very similar to the existing Shoji…3″ tall by 10″ wide with 3 rows across. A formula with a very traditional look that I use often.
Lucky I designed this so it would come apart easily as there was a corner in the hallway of the house that made carrying this difficult.
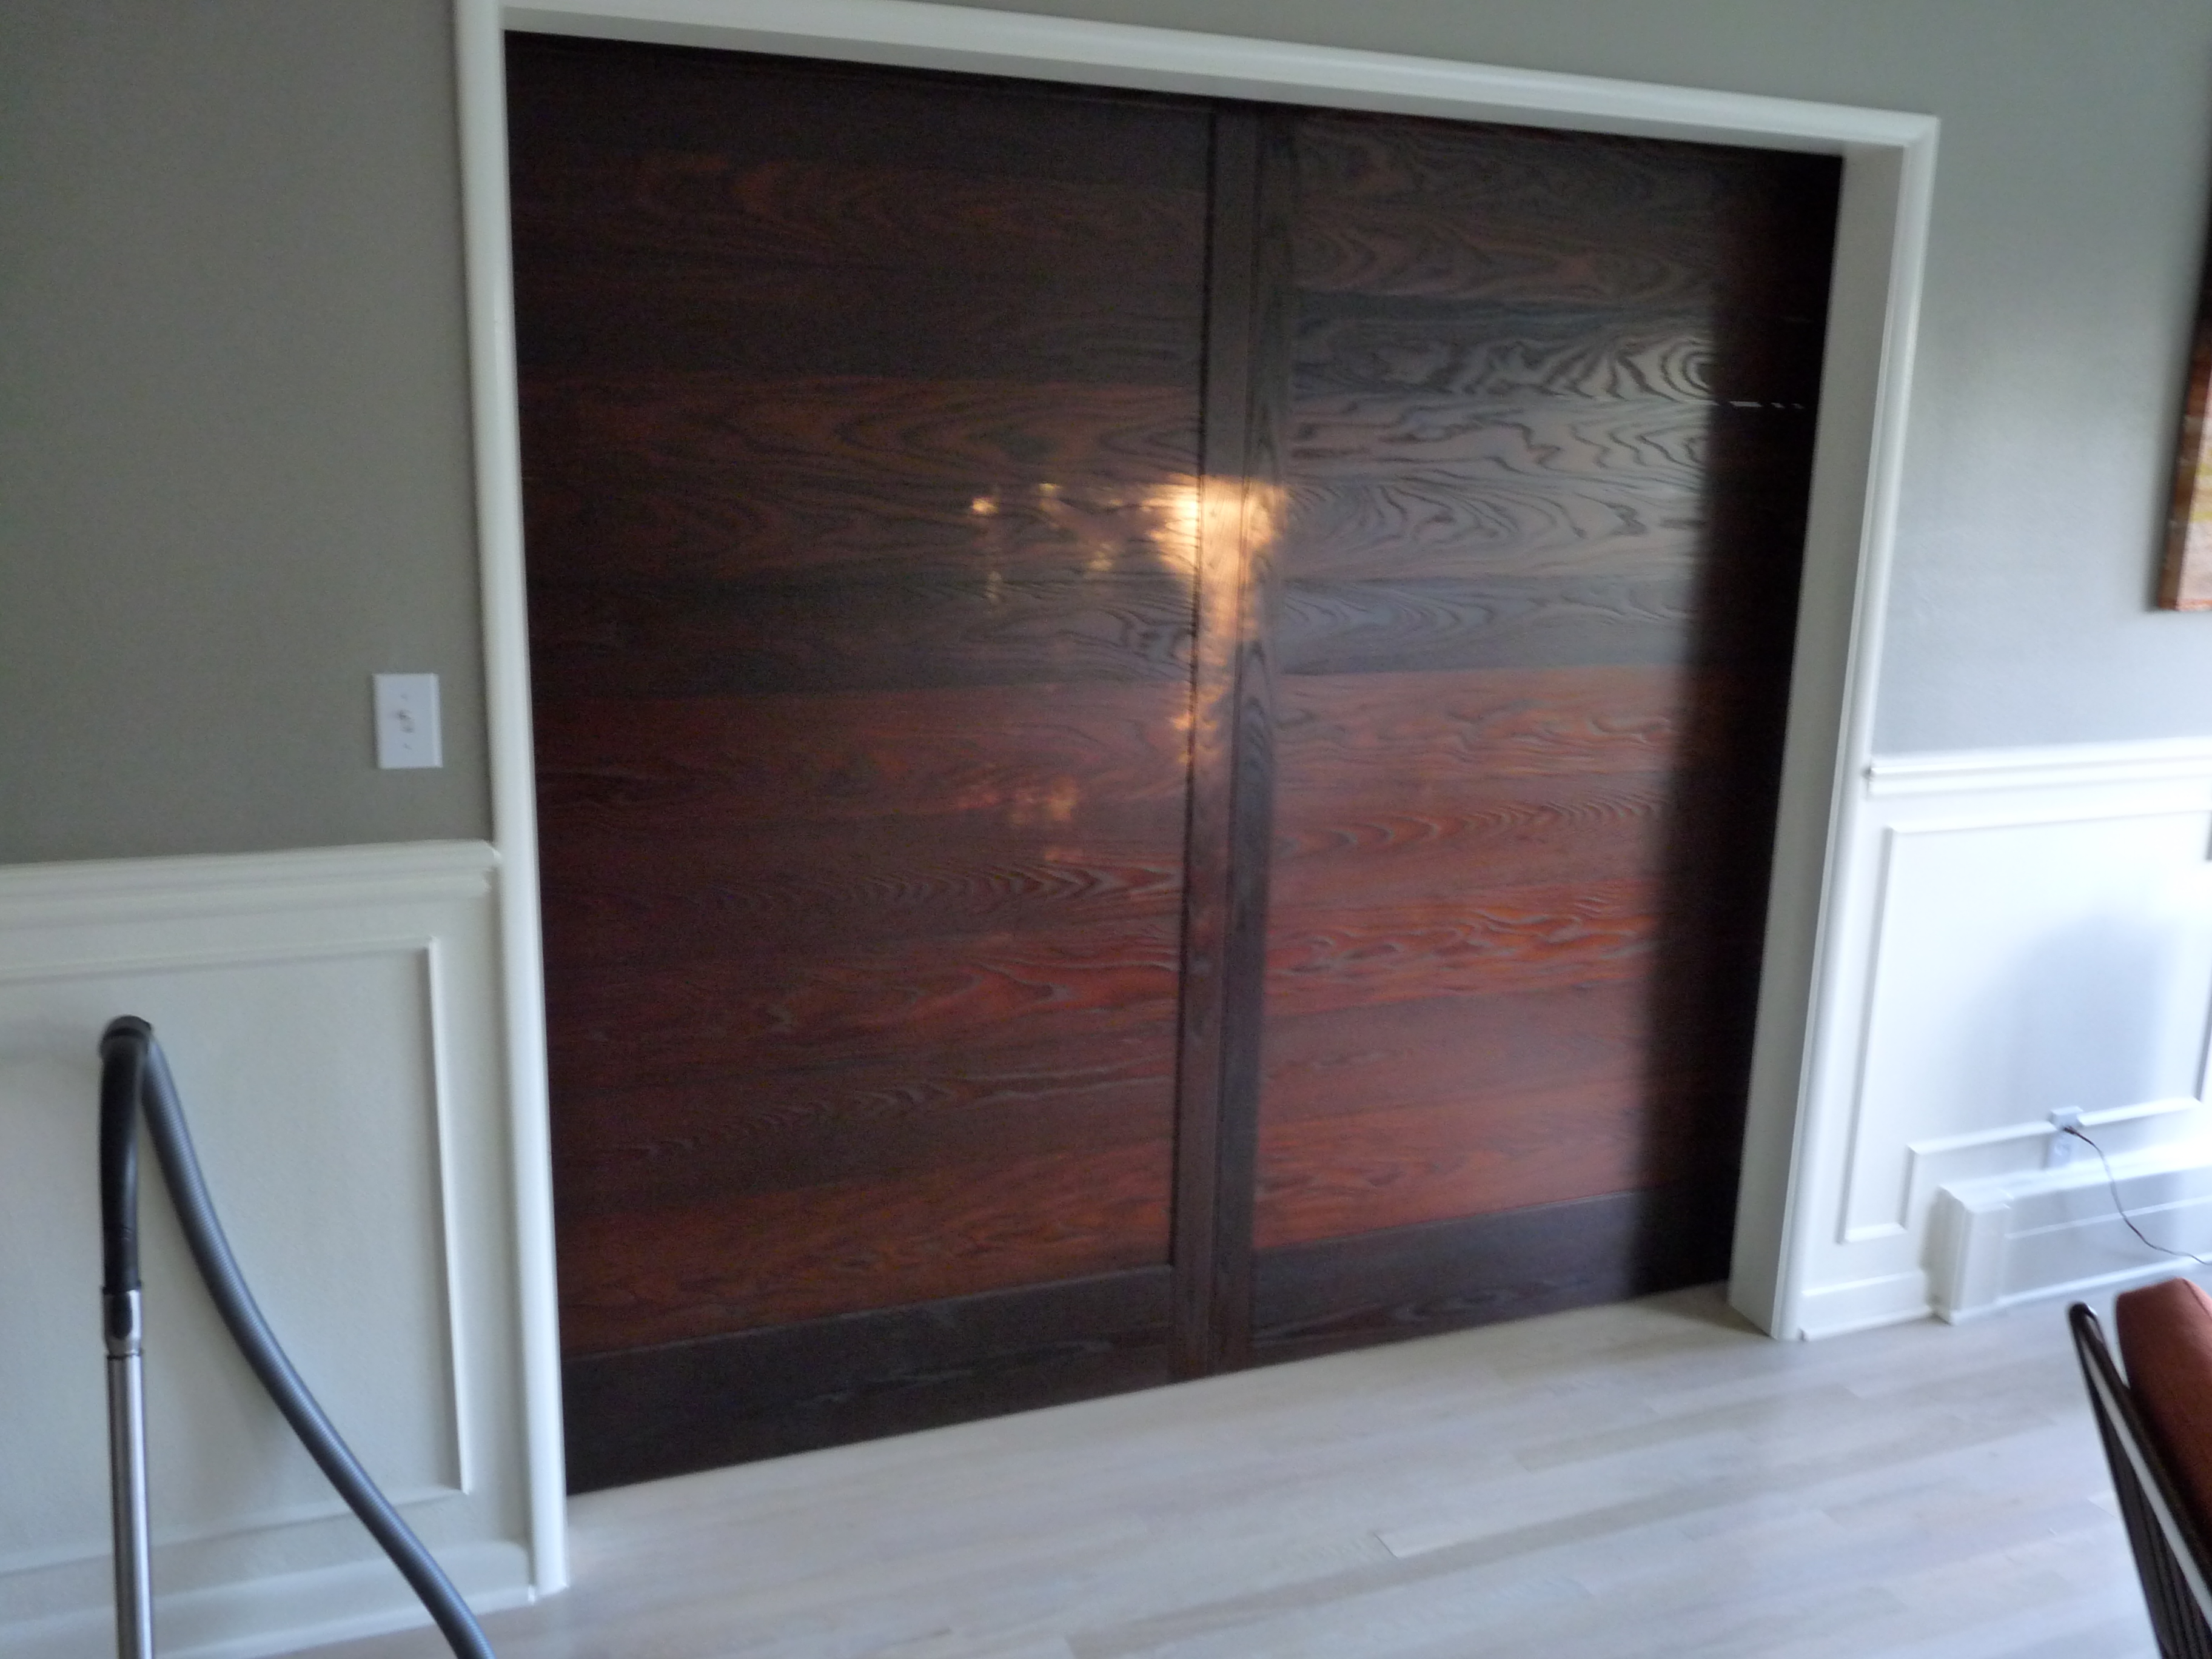
Turned out the room where it was installed was such that the ends are never seen. So including the kumiko grid on the ends was a moot point.

06-P1060373
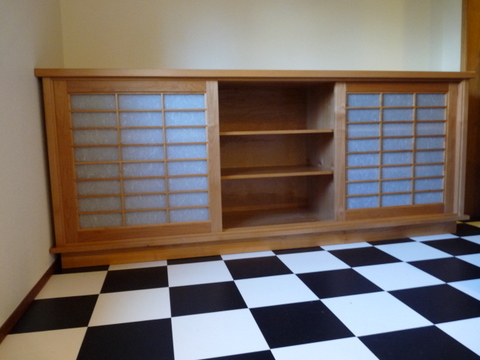
The clients love their cabinet and were so very nice to me. Lauretta even gave me a nice tip! my kind of client!

09-P1060379

02-P1060368


Installing a Closet Door Package with Jambs

Installing a Closet Door Package with Jambs

My client has hired me a few times in the last few yrs. Lately, I cut down his closet doors in a basement room and added my typical hardware setup to good results. In todays bit, I installed shoji in a hall/entry closet.

2-P1030955

The client wanted a “mill-core” type trim detail. This means NO trim and the dry-waller (or sheet-rocker) tapes the jamb directly to the drywall. This was popular with architects wanting a super clean line…NO CASING. Why I’m doing my blog on this job is to point out the custom made jambs on either side of the doors. A “Jamb” is the finish wood that covers the wall stud and drywall edges. 5-P1030952

A typical interior wall is 4-9/16″ thick. This incorporates a 3-1/2″ stud and a layer of drywall on either side of this stud. Using 4-9/16 or even 4-5/8″ wide material will cover the stud and drywall nicely. Any smaller and you have problems with gaps. In this case, we have NO casing. Here is how I made these…I ripped 3/4″ Birch plywood or Alder plywood to 4-9/16″ wide. I used my nice finish blade with 80 teeth for a smooth cut. I milled up 3/4″ x 1-1/2″ solid wood (to match) and glued and nailed these pieces to the edge I will use as the front or leading edge. On the back edge I used 1/4″ x 3/4″ and glued and nailed all pieces to be flush with the edge that goes against the drywall and stud. All sanded flush with 220 grt. The top part of this piece is notched to fit to the header and the valance box pieces  (these are usually 3/4″ x 3-1/8″).

1-P1030953

The 1-1/2″ pieces have the edges rounded over with a 1/8″ round-over bit in the router. If the closet has a light in it, use a valance piece on the front and the back  of the track-box as the light will escape over the doors top and look bad. The bottom track will be trimmed to fit between the jambs.   This can be used with casing. The main reason we did this was if the jamb is NOT installed plumb and very straight against the wall stud. The shoji will not fit nicely and have gaps. The light inside the closet will show in the gaps…looking like it was installed by an amateur.

4-P1030951

The piece on the edge blocks that light some and looks much more elegant and finished.

6-P1030950

Amado Door-Solid Wood Sliding Door

Amado Door-Solid Wood Sliding Door

I recently got a call from a retro-60’s furniture store owner. He told me he had a client that need my services.  It turned out that the client; Tim, needed about 8 lineal feet of sliding door. Although he was of Japanese decent, he was not interested in Shoji.

At my shop, I showed him a set of Amado doors I have from Japan and are about 80 or 90 yrs old. They are antiques  that I keep around to show people. They are made of Pine and look almost exactly like what I built in the pics below.

Tim loved them and we agreed that I would build him a pair of doors that slide on one track and slide to one side. They would be custom made to his opening of 94″ wide by 80″ tall.

Here is what I designed and built…

Wood: I chose a Tempered Ash. This wood might be called engineered. The manufacturer heats up Eastern Ash, normally a light yellow to blonde color with distinct grain. The wood is kiln dried then heated up so that the core is 180 degrees. This changes the composition of the wood. It cooks it! The wood turns a sort of dark caramel color throughout. This wood was designed to be used outdoors. Bug and rot resistant. And all without the use of chemicals. Great stuff.

08-P1040095 The frame is 1-1/2 x 3″09-P1040096  3/8″ x 1/2″deep dado11-P1040105 I jointed the edges of the 1/2″ panels so it would fit snug. These are re-sawn 2 x 10″. Rough-sawn to 3/4″, they are 1/2″thick once they are planed and sanded.

1-P1040115I applied 11/16 x 11/16″ verticle strips.

1-P1040140How it turned out…

The doors were finished with satin sheen lacquer. Gives it an oiled look.

01-P1040125-001This shot of the door at my shop lets you see the grain and color.

P1040144

Back side… This is the client’s private room that I screened away from the rest of the house.

The original use of this type of door was a shutter that fit into a track. They were stored in a slot in the wall. Like a closet for the doors. When a storm approached the house, the Amado were brought out and put in place, over the shoji. This protected the fragile paper.


The Bug-Screen Door Finished and Installed

The Bug-Screen Door Finished and Installed

1-P1030677P1030678

Looks nice…but my cat doesn’t like it! I assume she will destroy the beautiful bronzed screen. May have to put in a thin clear acrylic in the lower parts.

I live in a California Style Bungalow and they look great in my home.

Next up for my house is a pair of narrow shoji to replace the French doors in my office.


This door is now available as a kit for $1500. This includes the jambs, finish, hinges, and the screen installed. I can do this for $150 less if you want to finish it your self. The price includes a crate. You pay whatever the shipping is via Pilot Freight. probably around $220-275 to the major cities airports. Home delivery probably about $50-60 more. I can ship this to NYC address for $250 and that is delivered and insured.


Building a Bug-screen Shoji

When the flies started invading my house, I decided to take action!

I built a shoji of Western Red Alder, (Alnus Rubra) which is my favorite wood. I finished it with a Urethane varnish, also called polyurethane, as it offers a better resistance to heat, solvents and abrasions than any other varnish.

Finishing the wood is a major problem for woodworkers. They can do perfect work with the design, assembly and sanding…then mess it all up applying a finish. I ‘ve tried them all. I’ve bought an expensive spray gun and loads of materials to run therough it with varying success.

On this project I opted for a brush as traditionally that’s how varnish is applied. And, all in all it was successful. But next time I’ll spray it…or better yet, have the finisher I use regularly; spray it in his spray booth. BTW- I use STAN HANSON CUSTOM FINISHING right here in Portland. These guys are great and always are helpful to me.

Here is what the door looks like with no screen 01-P1030671

The Koshi-ita panel is traditional. Here it also functions as it would in Japan with a paper in it…the panel protects the bottom edge of the door and the roof overhang protects the upper part. it also keeps people from putting a foot or knee through the screen.

I bought my bronzed screen at my favorite Hardware store here in Portland; WINK’S HARDWARE. It’s not cheap; about $6.00 a running foot for 30″ wide screen. I could have used black too but the bronze is about the same color as the wood, so I went with that.

04-P1030668 05-P1030667

This is really hard to cut and have the piece be square. The kumiko is only 3/8″ x 3/8″.

I stapled it into the kumiko with 5/16″ staples and put on the other kumiko grid which I screwed on with tiny screws. This is so it can be replaced easily. I considered a storm window too but that was getting complicated and I needed a screen door quickly.

02-P1030672

And here’s what it looks like. I have made some jambs that will be surface mounted on the exterior casing. This screen will be hinged. Need to figure out how to make it close it’s-self without slamming.

03-P1030673 Can’t really see the bronze screen in this photo. Hopefully I’ll get it installed by tomorrow and post a pic of that.

I will be selling these in this kumiko design and in the traditional horizontal rectangle design in standard sizes. 30″, 32″ 34″ 36″ by 80″ tall.

They will be of Alder with a sprayed on Poly-Varnish. Will have the typical koshi-ita panel at door bottom

cost for 30″ and 32″ x 80″ door only: Unfinished $950

cost for 32″, 34″ and 36″ screen door is $1040

I can do these in clear Fir for $120 extra.

add $30 for finish and $150 for a crate if shipped. Shipping is extra.